11 Days of Salesforce Storefront Reference Architecture (SFRA) — Day 9: Jobs
Read time: 4 minutesJohnny Tordgeman

There may come a time where we want to run code automatically and repeatedly on our storefront (think Linux cron job). Such a job could be to update a local database with values, import or export product catalogs or even update a local resource on our site. SFCC provides us with a wonderful and accurately named framework — the Jobs framework — that enables us to handle these tasks.
Automate All the Things!
So what actually is an SFCC job? Well my young Padawan, an SFCC job is really a set of steps (actions) that are executed in order (flow) on a fixed time interval. Executing behind the scenes, jobs do not affect our storefront performance when running and are invisible to the user. Think of a job as a house-elf that does work for you while you sleep.
Jobs are managed in Business Manager under Administration -> Jobs. This is the central point for anything related to Jobs and also the prime focus of today’s post
Creating a Job
A common (and repeated) task for every website is maintaining a site map that provides information about the site structure so search engines will know what to index. Such a task is probably not something you want to deal with manually on a regular basis, which makes it the perfect candidate for our first job:
- Open your Business Manager and navigate to Administration > Operations > Jobs.
- Click on New Job (located at the top right corner).
- Fill in the following details and click Create:
- ID: SiteMapJob
- Description: A job to update the site map file.
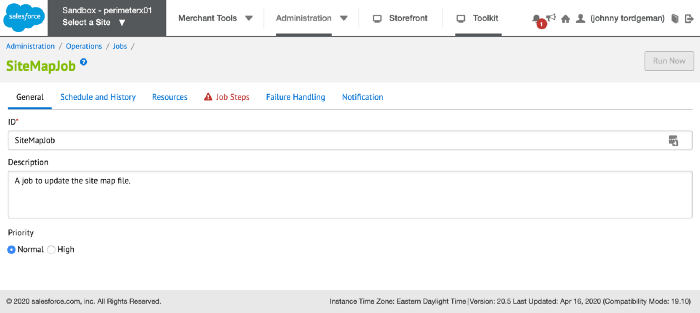
4. As soon as the job is created you’ll be greeted with the job configuration page. This is where you can configure (among other things) the two most important properties of a job: when it runs (Schedule and History) and what it does (Job Steps):

Yay, Job configuration page
Creating the Job Steps
Steps are the heart of the Job creation process. It’s here that we tell the job what to do, in which order to run its steps and what is the step context (global, specific site, etc.). Let’s add the site map creation step:
- Click on the Job Steps tab.
- Click on Configure a step.
- Choose CreateSiteMap, enter the following details, and click Assign:
- ID: SiteMapCreationStep
- Description: A job step to create the site map.
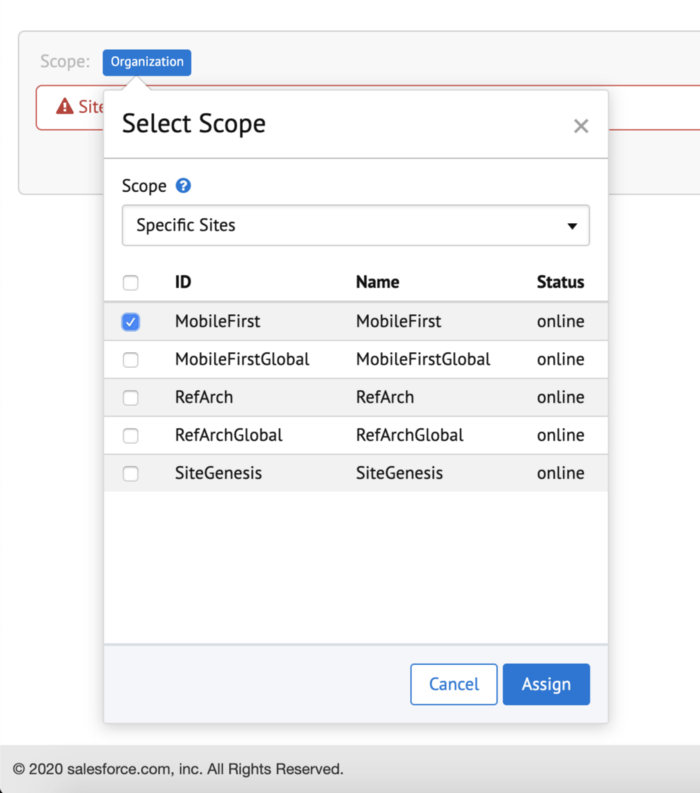
At this point, you might notice that while our new step is created, it is highlighted in red . Do not fear, this is normal! A site map is, as its name suggests, scoped to a site. Our step, however, is currently scoped as organization.
4. Click on the blue Organization button on the top left corner of our step and change the scope dropdown to Specific Sites. Check the site(s) you wish the job to run on and click Assign.

MobileFirst will be the only site my job runs on.
Scheduling The Job
Now that we configured the “what” let’s define the “when”:
- Click on the Schedule and History tab.
- Check the Enabled checkbox. This defines our job as a scheduled one.
- Change the Trigger drop-down from Once to Recurring Interval.
- Under Every set Amount to 1 and Interval to Days. This triggers our new job once a day.
There are many other scheduling options you can set in this tab. You can have the job run only on specific days, you can have the interval to be minutes, hours years etc. and you can even set a start and end date for your job if you want to have it run in a specific time frame.
Go Wild
With everything in place, let’s run our job and see its status!
On the top right corner, you should see a blue Run Now button. Click it and wait a few seconds. On the bottom of the page, under the Job History section you should see the result of running our job:

The sweet taste of success
And there you have it! An automated job that will keep your sitemap fresh and updated, while letting you deal with much more important stuff.
If you liked this out-of-the-box job we created here, then you are in for a treat tomorrow as we are going to deep dive into the world of custom code job steps.
As always, looking forward to your comments either here or on Twitter